
Replacing the roof over your head is one of the most significant, high-value investments you can make in your property. It provides critical protection against the elements, enhances energy efficiency, and dramatically boosts your home’s curb appeal. However, the journey to getting that beautiful, structurally sound new roof involves a few days of intense, loud, and messy construction work.
Many homeowners underestimate the sheer scale of a roof replacement project. It is not merely a matter of a crew showing up and quietly swapping out a few materials. A full tear-off and replacement involves removing thousands of pounds of old materials, hauling heavy bundles of new shingles up ladders, operating loud pneumatic tools, and navigating your property with heavy equipment. The reality is that your house will briefly become an active construction zone.
While the crew will handle the heavy lifting, the homeowner plays a vital, proactive role in setting the stage for success. Proper preparation is the secret to a smooth, stress-free project. By taking specific steps before the crew even arrives, you can protect your valuable landscaping, safeguard your personal belongings, ensure the safety of your family and pets, and help the crew work as efficiently as possible. A well-prepared property minimizes the risk of accidental damage and allows the workers to focus entirely on the quality of their craftsmanship.
This comprehensive guide is designed to walk you through every phase of preparation. From clearing the driveway to safeguarding your delicate interior fixtures, the following detailed, step-by-step strategies will ensure you, your home, and your yard are fully ready for the big day.

Secure the Exterior and Clear the Yard
The outside of your home is where the vast majority of the chaotic activity will take place. When a crew begins a tear-off, they are actively pulling up old, brittle shingles, underlayment, and thousands of rusted nails. Gravity dictates that much of this debris will come sliding down the pitch of your house before making it into a dumpster. Therefore, securing the immediate perimeter of your home is your first major priority.
Relocate Vehicles and Clear the Driveway
Your driveway is about to transition from a parking spot into the central command station for the entire project. It will be utilized for material delivery trucks, crew vehicles, and a large roll-off dumpster.
To prepare this area effectively, you should take the following steps:
-
Move vehicles early: Relocate all cars, trucks, motorcycles, and even boats from your driveway and garage the evening before the project begins. Once the dumpster is placed and the material trucks arrive, your vehicles will be blocked in.
-
Park at a safe distance: Move your vehicles safely down the street, ensuring they are not parked directly in front of your house where heavy supply trucks will need clearance to back in.
-
Clear the garage access: Even if your car is in the garage, you will not be able to open the garage door and back out safely while debris is falling. Keep the garage doors closed to prevent dust and stray nails from bouncing inside.
Having a completely clear driveway allows roofing contractors to strategically place the dumpster as close to the house as possible, which minimizes the distance debris has to fall and dramatically speeds up the cleanup process.
Protect Landscaping, Potted Plants, and Patio Furniture
Your yard, patio, and garden beds are directly in the drop zone. While professional crews take great care to lay out catch tarps, you must take the initiative to protect your movable outdoor items.
-
Relocate movable items: Move patio furniture, barbecue grills, fire pits, children’s toys, bicycles, and potted plants into a storage shed, the garage, or a part of the yard safely away from the house.
-
Protect delicate garden beds: If you have prized rose bushes, delicate shrubs, or expensive flower beds situated directly against the foundation of your home, cover them with breathable landscape netting or a lightweight tarp.
-
Prune back tree branches: If you have low-hanging tree branches that scrape against the house, consider trimming them back a few days prior. This gives the crew the clearance they need to maneuver their ladders and perform their roofing services without obstruction.
Mark Sprinkler Heads and Disable the Irrigation System
Irrigation systems are surprisingly fragile when subjected to the rigors of a construction site. The heavy foot traffic of workers carrying bundles of materials can easily snap off a hidden sprinkler head.
-
Turn off the water: Disable your automated sprinkler system at least two days before the start date. You want your lawn to be as dry as possible. Wet grass is a severe slipping hazard for workers carrying heavy loads, and a soft, muddy lawn will easily suffer deep tire ruts from material delivery trucks.
-
Flag the hidden hazards: Purchase a pack of brightly colored landscaping flags from your local hardware store and place one directly next to every sprinkler head, valve box, or hidden landscape lighting fixture.

Safeguard the Attic and Interior Spaces
While the exterior of your home is the obvious construction zone, many homeowners are caught off guard by how much a roof replacement impacts the interior of the house. The process of stripping old materials and installing new decking and shingles involves intense physical force. This translates to significant vibrations and a surprising amount of dust inside your home.
Cover or Remove Valuables Stored in the Attic
If you use your attic for storage, you need to prepare for a mess. Roof decking is rarely airtight; it is composed of wooden boards or plywood sheets with hundreds of tiny gaps and seams.
When the old felt paper and shingles are torn off, decades of accumulated dust, sawdust, dried leaves, and wood splinters will inevitably filter down through those tiny gaps. Furthermore, if the crew needs to replace any rotted wooden decking, the debris falling into the attic will increase exponentially.
-
Use heavy-duty protection: Purchase large, heavy-duty plastic drop cloths and drape them entirely over any boxes, holiday decorations, seasonal clothing, or heirloom furniture stored directly under the roof deck.
-
Relocate the highly sensitive items: If you have items in the attic that are exceptionally fragile, sensitive to dust, or highly valuable, it is best to remove them entirely and store them in a ground-floor closet until the project is finished.
-
Expect the dust: Whether your home has a steep pitch or utilizes residential flat roofing, the dust intrusion in the immediate space below the decking is unavoidable. Tape plastic sheeting over the attic access door to prevent that dust from circulating into your living spaces.
Secure Wall Decorations and Fragile Items on Top Floors
Imagine someone standing on the outside of your ceiling and pounding it with a hammer thousands of times over a few days. That is essentially what is happening during a replacement. The pneumatic nail guns and the dropping of heavy material bundles send intense, rhythmic vibrations traveling down the wooden framing of your house.
These vibrations can easily rattle items off the walls, especially on the top floor of the home. Even routine local roof repairs can generate enough movement to shift unsecured items.
-
Clear the walls: Take down any mirrors, framed artwork, photographs, and decorative plates hanging on the walls of your uppermost floor.
-
Secure floating shelves: If you have floating shelves, remove the decorative items resting on them. The shelves themselves might stay attached, but the vibrations will cause objects to “walk” off the edge.
-
Lay things flat: The safest place for these fragile items is laid flat on a bed, covered with a soft blanket, or placed carefully on the floor in a safe corner of the room.
Protect Light Fixtures and Chandeliers
Just as vibrations travel down walls, they also travel across ceilings. Light fixtures, especially those located on the highest ceiling of your home, are susceptible to shaking.
-
Check glass domes: Inspect flush-mount ceiling lights and ceiling fans. If they feature decorative glass domes or shades, ensure the mounting screws are tightened. If they feel loose or delicate, remove the glass completely for the duration of the project.
-
Monitor chandeliers: Large, hanging chandeliers should be closely monitored. If you have an exceptionally fragile or antique chandelier, consult with the project manager about the best way to secure it, which may involve temporarily supporting it or removing delicate crystal elements.
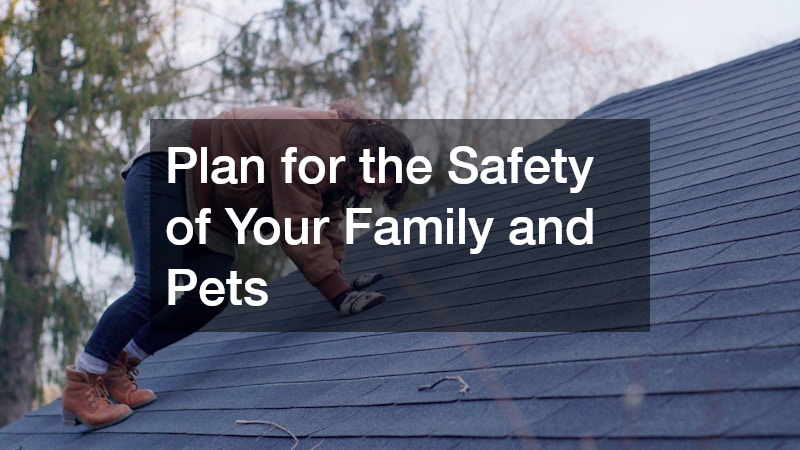
Plan for the Safety of Your Family and Pets
A roof replacement is not a spectator sport. While it might be fascinating to watch the progress, safety must be the absolute highest priority for everyone living on the property. The environment involves ladders, power tools, heavy debris, and an element of unpredictability.
Designate a Safe Zone for Children and Animals
Children are naturally curious, and a construction site with trucks, tools, and busy workers can look like an exciting playground. However, the yard is incredibly hazardous during this time.
-
Establish strict boundaries: Sit down with your children before the project begins and explain that the yard is strictly off-limits. There will be falling debris, sharp tools, and the ever-present danger of stray nails hidden in the grass.
-
Keep pets indoors: Dogs and cats must be kept safely inside the house. A startled pet could easily dart out of an open door and run directly into a hazardous work zone. Furthermore, workers carrying heavy bundles cannot easily stop or dodge a pet running around their feet.
-
Consider pet boarding: The loud noises, strangers walking on the roof, and constant thudding can be incredibly stressful for animals. For their safety and peace of mind, you might want to consider booking your dogs into a doggy daycare or having a friend watch them while the roofers are active.
Consider Relocating During the Loudest Construction Phases
You cannot overstate the noise level of a roof replacement. It is a symphony of scraping, thumping, sawing, and the constant, rapid-fire popping of pneumatic nail guns. If you plan to stay in the home, you must prepare for this disruption.
-
Working from home: If your job requires you to be on phone calls or video conferences, you will likely find it impossible to work efficiently. Plan to relocate to a local library, a coffee shop, or a co-working space for the days the crew is tearing off and installing the new materials.
-
Managing nap schedules: If you have an infant or toddler who relies on daytime naps, the noise will almost certainly disrupt their routine. Any reputable residential roofing company will do their best to work swiftly, but they cannot work quietly. Consider spending the day at a relative’s house to ensure your little ones can sleep.
-
Protecting your own peace: Even if you do not have to work or manage children, the constant noise can induce headaches and stress. Planning a day trip or running lengthy errands is a great way to escape the chaos and return when the crew is wrapping up for the evening.

Communicate with Your Neighbors and Community
Your property does not exist in a vacuum. A project of this magnitude will inevitably have a ripple effect on the surrounding homes. Being a considerate neighbor and managing the expectations of your community is a crucial part of the preparation process.
Give Surrounding Homes Advance Notice of the Project Dates
Your immediate neighbors will also experience the noise, the extra vehicles on the street, and potentially some stray dust blowing across the property line. Giving them advanced warning is not just polite; it allows them to protect their own property.
-
The personal touch: A few days before the project begins, knock on the doors of the houses immediately to your left, right, and across the street. Inform them of the dates the crew will be working.
-
Drop a note: If they are not home, leave a polite, handwritten note in their mailbox. Let them know what to expect regarding noise and the presence of material trucks.
-
Why it matters: Informing them about the upcoming roofing installation gives them the opportunity to move their own cars away from your shared property line, keep their pets indoors to avoid anxiety from the noise, and close their windows so construction dust doesn’t blow into their homes.
Check Local Noise Ordinances and HOA Guidelines
Every municipality and neighborhood has different rules regarding construction projects, and it is the homeowner’s responsibility to ensure the project complies with local community standards.
-
Review your HOA bylaws: If you live in a community governed by a Homeowners Association, consult your rulebook. There are often strict guidelines dictating where dumpsters can be placed, how long they can sit in the driveway, and what hours construction crews are allowed to operate.
-
Understand municipal noise codes: Most professional roofing companies prefer to start their days early, often arriving just as the sun comes up. This allows them to get a head start before the afternoon heat sets in. However, you must verify that their start times do not violate local noise ordinances, which often prohibit loud construction before 7:00 AM or 8:00 AM.
-
Clear the street: Ensure that the delivery of materials and the parking of crew vehicles will not block neighborhood traffic, school bus routes, or fire hydrants.
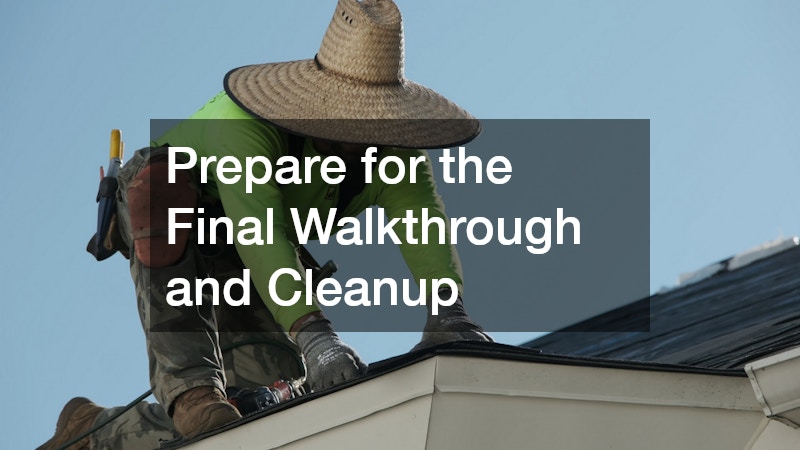
Prepare for the Final Walkthrough and Cleanup
The project is not truly finished until the final piece of debris is hauled away and the property is restored to its original state. Cleanup is a massive phase of the project, and knowing what to expect and what to look for will ensure you are completely satisfied with the result.
Request a Secondary Magnetic Sweep of the Perimeter
A standard roof replacement generates thousands of old, rusted nails. During the tear-off, these nails fly in every direction, easily hiding in tall grass, landscaping bark, and the cracks of your driveway.
-
The rolling magnet: The crew will use a large, heavy-duty rolling magnet to sweep your yard, driveway, and garden beds to pick up these stray fasteners.
-
Ask for a double-check: Because nails can hide deep in the grass or bounce into unusual places, the first pass of the magnet is rarely 100% perfect. Before you sign the final paperwork, politely ask the project manager to perform a secondary magnetic sweep.
-
The importance of diligence: A high-quality residential roofer will usually perform multiple sweeps as a standard part of their operating procedure, but asking for confirmation ensures that your yard is perfectly safe for bare feet and car tires.
Inspect the Driveway and Walkways for Leftover Debris
Before you start moving your patio furniture back to the deck or pulling your vehicles into the driveway, take a slow, deliberate walk around the perimeter of your home.
-
Check the gutters and downspouts: Ensure that no loose shingles, plastic wrappers, or roofing nails were left behind in your gutters, which could cause clogs during the next rainstorm.
-
Look for micro-debris: Keep an eye out for small scraps of underlayment, splinters of rotted wood, or loose shingle granules on your driveway and walkways.
-
Review the whole picture: Whether you had a complete system overhaul or utilized a targeted roofing repair service for storm damage, the construction site should be meticulously cleaned. If you spot any leftover debris or accidental damage to your landscaping, point it out to the project manager immediately so it can be rectified before the crew departs.
Conclusion
A home improvement project of this magnitude will always bring a brief period of disruption to your daily life, but it does not have to bring chaos. By understanding the reality of the construction environment and taking proactive steps to control what you can, you transition from being a passive bystander to an active partner in the success of the project.
Taking the time to strategically clear your driveway, cover your sensitive attic belongings, protect your delicate landscaping, and communicate openly with your neighbors requires only a small investment of your time. However, that small investment pays massive dividends by preventing accidental damage, eliminating unnecessary stress, and creating a safe, efficient workspace for the crew.
Ultimately, preparation is the key to peace of mind. Use the detailed checklists and strategies outlined above to confidently navigate the process. Before you know it, the dumpsters will roll away, the noise will fade, and you will be left to admire a beautiful, highly durable upgrade that will protect your family and your property for decades to come.